August 24, 2015

Free Pattern: Simple Garter Baby Blanket

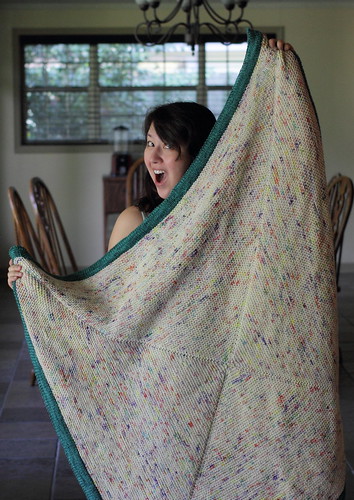
I recently finished a blanket for my incoming Super Awesome niece or nephew.  We are over a week away from finding out the gender, so I went with fun, gender-neutral speckles.  I'm so in love with the results!

IMG_4409


IMG_4412

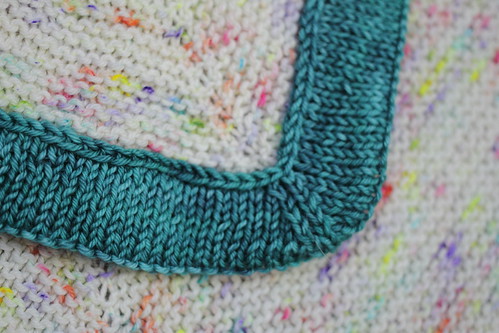
I've had a few people ask about what pattern I used, but I just improvised a simple, center-out garter stitch square.  I gave it a double-sided stockinette border for a little pop.  I'm really happy with the results and thought I'd share the notes with you lovelies!  ♥

Materials  

Yarn:  Madelinetosh tosh dk (100% merino, 225 yd per 100 g ball), 5 skeins of "Cosmic Wonderdust" (MC) and 2 skeins of "Mineral" (CC)

Mine is pretty big at 38x38" unstretched.  (And we all know garter stitch has a lotta stretch.)  If you wish to make a smaller or larger size, you could easily modify the pattern to get away with less or more.  Once you run out of your MC, simply skip right on to the border.  If you only have one skein of your border color, once you've reached halfway through your MC skein, do your purl round and move on to the decrease portion.  You can either weigh your skein or eyeball it if you are good like that.)

Needles:  US Size 8/5.0 mm circular needles (you can start with DPNs, but this sucker gets big fast) 

Gauge:  16 sts and 24 rows in 4" stockinette

Notions:  Yarn needle and (4) stitch markers

Directions

Body:
 
With MC, CO 6. Place marker and join in round.

Rnd 1:  Kfb every stitch in round (12 stitches)
Rnd 2:  Purl every stitch in round
Rnd 3:  Kfb every stitch in round  (24 stitches)
End 4:  Purl every stitch in round

Rnd 5:  (Kfb, k4, kfb, pm) repeat around (This should give you the four sides of your square.)
Rnd 6:  Purl every stitch in round
Rnd 7:  (Kfb, k to marker, kfb), repeat around

Repeat rounds 6 and 7 until you have 150 stitches between each set of stitch markers (or until you are close to done with your MC yarn or until desired size)

Border Increases:

Rnd 1:  With CC knit around
Rnd 2:  (K1, M1R, knit until 1 stitch before marker, M1L, k1) repeat around

Use your favorite "make 1" method.  I like to pick up the little ladder between stitches and knit into the back of it.

Repeat rounds 1 and 2 a total of 4 times.

Rnd 3:  Purl around
Rnd 4:  Knit around

Rnd 5:  (K2tog, knit until 2 stitches before marker, ssk) repeat around
Rnd 6:  Knit around

Repeat rounds 5 and 6 a total of 4 times.

Fold the border on the purl row so that the two purl sides are facing.

Pick up the first CC purl bump from the first border round and slip it to the left needle.  Knit together the purl bump with the first regular stitch.  Repeat again this process of picking up the next purl bump and knitting it together with the next stitch.  You should have two stitches on your right needle.  Pass the first one over the second to bind off that stitch.

Repeat this process of picking up purl bumps from the first border row, knitting them together with the live stitches on your needles, then binding off.  The result should start to look like this:

IMG_4409

You will have a stockinette border on both sides of your work.

Weave in ends.  Enjoy!!

January 8, 2014

Free Pattern: Swirly Smooshy Cowl

IMG_8733

IMG_8718

Hungry for a quick knit that is also super smooshy and warm?  This worsted weight cowl is knit on big needles with a super simple stitch pattern, making it a great last minute gift or an instant treat for yourself!  :)

October 15, 2013

Free Pattern: Hogwarts House Cowl

IMG_5326

IMG_5263

Want to show off your house colors while exploring the muggle world, but find your house scarf too heavy for the occasion?  Or maybe you are just crazy about cowls and want to give your knitting wands a little work out.  Either way, this cowl will keep you as warm as you work your magic!  ;)

July 2, 2013

Super Secret Hexipuffs!

IMG_4837 alt

It's a hexipuff with a super secret compartment for hiding notes or tiny trinkets!  If you sew it into your quilt with the button facing the "wrong side", no one will suspect your quilt is hiding anything at all.  ;)

Knit a puff like normal.  Before you bind off, stuff it with about half of what you usually stuff it with.  Instead of binding off, purl a round, then continue to knit each round until it's about the height of your puff.  Bind off the same way you would a puff.

It'll look something like this:

IMG_4798

Tuck your pocket into the puff.  If you want to secure the pocket, sew the corner of the pocket to the lower corner of the puff with the end of the yarn before weaving it in.

Sew a button on one side.  To make the loop for the button, you can use a crochet hook to chain 3 in the middle of the other side, and tie it off near the starting point to make a little loop.

Enjoy your secret puffs!  ♥


June 19, 2013

Hexibunnies!

Does your beekeeper's quilt need a little bunny love?  Then here's a tutorial on how to modify an already finished hexipuff to an adorable bunnypuff!

IMG_4557

IMG_4563

On an already finished hexipuff, pick the two corners you want to be the ears.  On one corner slide your needle under four stitches on one side of the puff.  Do the same onto the other side of the corner using a second needle. One needle will be your "front" needle and the other needle will be your "back" needle.

1.  (K1, p2, k1) on the front, knit all on the back
2-3.  Repeat round 1
4.  (K1, purl front and back of one stitch, p1, k1) on the front, (knit 1, kfb, k2) on the back
5.  (K1, p3, k1) on the front, knit all on the back
6-13.  Repeat round 5
14.  (Ssk, p1, k2tog) on the front, (ssk, k1,k2tog) on the back

Use the same technique you use to bind off your hexipuffs (three needle bind off or crochet hook), and repeat on the second corner for the second ear.

I used overhand knots for the eyes, which are very simple.  (I believe Miss Tiny Owl Knits has a quick video here:  http://vimeo.com/tinyowlknits/thewoodsyassociation#t=499)  I looped my eyes 5 times.

I hope this tutorial was helpful!

♥ ashley


May 6, 2013

Selfish Knitting: An Autobiography

cowl stash

shawl stash

hat stash

Guys.  I have a problem.  Half of my drawers are for my knits, and those drawers are getting full.  So, during those two cold weeks we have in Louisiana, I've got options.  

I should probably stop being such a selfish knitter.  Or maybe I could get another dresser...

♥ ashley

April 29, 2013

Pretty Pictures and Hexipuff Hints!

I got a new camera last week and, much to Bruiser's distress, I've been taking pictures non-stop.  

hexipuffs_1

hexipuffs_3

After posting these pictures a few days ago, I received a few questions from people about my hexipuffs.  First, someone asked how I was joining my hexipuffs, and then more specifically, how exactly am I tying them together?

So much like the pattern's instructions, here's the "wrong side" of my Beekeeper's Quilt:

hexipuffs_back

Using DK weight scrap yarn, I run my needle through each corner of the three puffs I'm tying together, like this:

howto_1

howto_2

Then I tie two of these regular knots, like I'm tying my shoes really tight:

howto_3

Next, I do one of these knots, and roll it down to the three corners before pulling it tight:

howto_4

Lastly, I cut the excess string off!

howto_5

There are probably better, prettier ways to tie your hexipuffs together, but this way is fairly quick and I like the way it looks.  Plus, if you later decide you don't like how one looks, you can just carefully cut at the knot until it's loose, pull the puff out, and tie another one in!

I hope this helps! 

December 16, 2012

Secret Santa

I have the coolest knitting group.  Not only do they keep me sane through the stressors of pharmacy school and life in general, but we do all sorts of fun things together.  I've already shared with you our Knit in Public Day and our yearly knitting retreat, but now I'm going to tell you why our group rules:  Secret Santa Swap.

The whole process starts early in spring on our Ravelry board.  Everyone fills out the posted questionnaire, detailing out their likes, dislikes, sizes, and favorite yarns, knitted items and colors.  All that stuff you would want to know about someone you are making a secret gift for.  Then someone finds a friend to secretly assign everyone a partner to make a Christmas care package for.  

Each care package must consist of:
  • 1 knitted gift
  • 1 skein of yarn
  • 1-2 non-knitted miscellaneous things 
  • 1 Christmas ornament (or just another miscellaneous gift if your giftee doesn't celebrate Christmas)
Then sometime in December we have a nice dinner where we swap gifts and "ooooh" and "awwww" over everybody's pretties and squishies.

This year may have been my trickiest yet because my Secret Santa giftee does not like hats.  CRAZY, RIGHT?!  I mean, all I knit is hats!  I am known as the Mad Hatter in the group.  How could I be assigned the one knitter in our group who doesn't like hats.  But it's okay.  CHALLENGE ACCEPTED.

I scanned my partner's questionnaire again and noticed that she mentioned knitted headbands twice.  A headband is practically a hat.  Plus, knitted headbands are in this year.  Or at least that's what my fashionable sister tells me.  Okay, so maybe it wasn't that tricky, but look how cool this headband is:


I just love those flecks of blue and pink.  Madelinetosh, you are my one true love!  (Sorry, Jonathan...)

I think it's pretty darn cute!  The pattern is the Parisian Twist Headband by Elisa McLaughlin.  I used a scrap ball of Madelinetosh tosh merino in Steam Age.  AND IT KNIT UP SO FAST.  Definitely a bonus!  I think I'll make myself another one after the holidays.

One of the many great things about my Secret Santa giftee is that she loves all the colors and all yarn weights.  I was pretty much able to dote on her with any skein of happy I felt like.  I tucked a nice Madelinetosh (I'm such an addict, I KNOW) tosh sock in Calligraphy.  It just looks so happy and squishy!


And here are some of the other goodies my care package included:


A cute pocket notebook for sketching pattern ideas!  My secret giftee sews too, so maybe she can sketch out both knitting and sewing ideas here.  ♥
A Chibi tapestry needle set!  It's a little container for your darning needles so they don't get lost.  :)
And the last piece of the Secret Santa Swap, the ornament!  I made a hexi-ornament and put a little heart on him.  :)
Here's the whole gang, ready to be wrapped up for my secret giftee!  ♥
Usually my sister does my gift wrapping for me because she has this amazing talent for making bows, but she was out of town the night before the swap party.  I was forced to wrap this thing on my own.  Like an adult...  Queue dramatic horn kick.  

Luckily I've picked up a little bit on bow making from my sister:
It's nothing like Jamie's bows, but I think it turned out okay!  :)
After sweating for half the year on getting my gift ready, I almost forgot that someone was making a gift for me!  Watching everyone open their gifts was magical.  Some gifts were so personal and touching that tears were shed.  (I've got lots a feelings, okay?)  

It turns out that my friend Nikki was my Secret Santa.  She made me the coolest hat/cowl ever!  Not only does it have pom-poms and buttons, but it has four stranded color work and an i-cord drawstring.  That's some serious love right there.  It's been a few days since the swap and I'm still in awe of it.


This is a skein of Classic Elite MountainTop Vail that Nikki hand dyed for me at the knitting retreat!  It's 200+ yards of baby alpaca and bamboo that is gorgeous to boot.  


She also sneaked in a pair of Knit Picks Harmony Wood interchangeable needles in a size I was missing as well as a handmade ornament.  I don't have a Christmas tree at my house, so she made me a decorative holiday window hanging.  So cool!

I was so spoiled by Nikki.  I played with my pom-poms all night.  I'm still playing with the pom-poms.  I love them.  Pom-poms are my spirit animal.  ♥

I love our group's yearly Secret Santa swap.  It's so great to exchange gifts with what has become my second family.  Seeing what everyone comes up inspires me to push my knitting to the next level to become the a knitting jedi master like some of our other group members.  Maybe next year I'll try some fancy bead work...  ♥

November 30, 2012

Christmas Knitting

It's that time of year again...  The time of year that I feel simultaneously loved and abused by my entire family.   Every time I think I'm finished with my Christmas list, my mom adds another relative who told her they really wanted to be on the Knit List this year.  Last year I knit for 26 people.  Twenty.  Six.  It was crazy.

I cut the list back extensively this year.  I'm knitting for maybe seven or eight people.  Even with the cutbacks, I am still nowhere near done with my Christmas knitting.  That's probably because my sister requires three items.  Christmas, her birthday, and her college graduation all in one month.  I have finished one of her gifts though!


Happy socks!  Made in Knit Picks Felici self-striping sock in Afternoon using the Socks 101 pattern from Knitty.  I love this yarn so much.  It makes such great, vibrant socks.  Plus, being able to actually wear them around and throw them in the washing machine helps a lot!

I've knit my dad a hat for ever holiday for the past 6 years.  He has well over 20 hats.  I am the Mad Hatter, after all.  This year, I decided to do something a little different.  I'm sure you guys have already seen the amazing Alex Tinsley's Howlcat, the hat that is also a cowl.  Or is it a cowl that's also a hat?


Made with Madelinetosh vintage in Steamer Trunk and Madelinetosh tosh merino light in Moorland, and modeled ever-so-sweeetly by Jonathan.  


Some socks for my boss using the Socks 101 pattern again. (Truthfully, I've never tried another sock pattern.  I really should branch out my sock game one day...)  They were too big for my tiny feet so I couldn't take a picture of them on, but I swear they are super cute!


I made this hat for the other pharmacist I work with.  It's another Alex Tinsley pattern Maelstrom Beret in Knit Picks Wool of the Andes Tweed in Prussian Healther.  The skein didn't have quite enough yardage to make the hat, so I had to do the decreases early, making it more beanie than beret, but that's okay.  It's still pretty cute!

And that's what I've got done right now.  I still have a ton left to finish before December 25th.  I also have finals next week and the family Christmas card to draw the week after.  Feel free to place your bets on me losing my mind before this is all over!

I guess when all the gifts on my Knit List are all unwrapped and worn, it will be worth all the stress.  I am very lucky my family and friends appreciate hand knits enough to request items from me instead of wrinkling their noses at yet another knit hat.

...but this is still a lot of knitting to do.  Oh man, oh god, oh man.  I'm going to breathe now and get it done.  I'll see you guys later!

P.S.  I've got one of those Tumblr things now if you are interested in pictures of my WIPs and cat.  ♥

October 29, 2012

The Day We Dyed

This weekend was my knitting group's yearly knitting retreat.  Every fall the group rents a cabin in the woods to spend the weekend knitting, dying yarn, playing games, or whatever strikes their fancy.  This was the first year I had the weekend free to go and I am oh so glad that I did!  Not only did I have a ball spending the weekend away with my favorite nutty knitters, but as a knitter that had never delved into the world of dying, I was happy to have my support group walk me through the process.  


I had a plan in mind when I brought my two skeins of natural Malabrigo Lace to the dying party. (Yeah, we made the dye/die joke the entire weekend.)  I had heard about people dying their yarns with coffee and tea.  I'm a tea junkie so I made a few cups of earl grey and chai and then threw the tea bags in the vinegar mix for good measure.


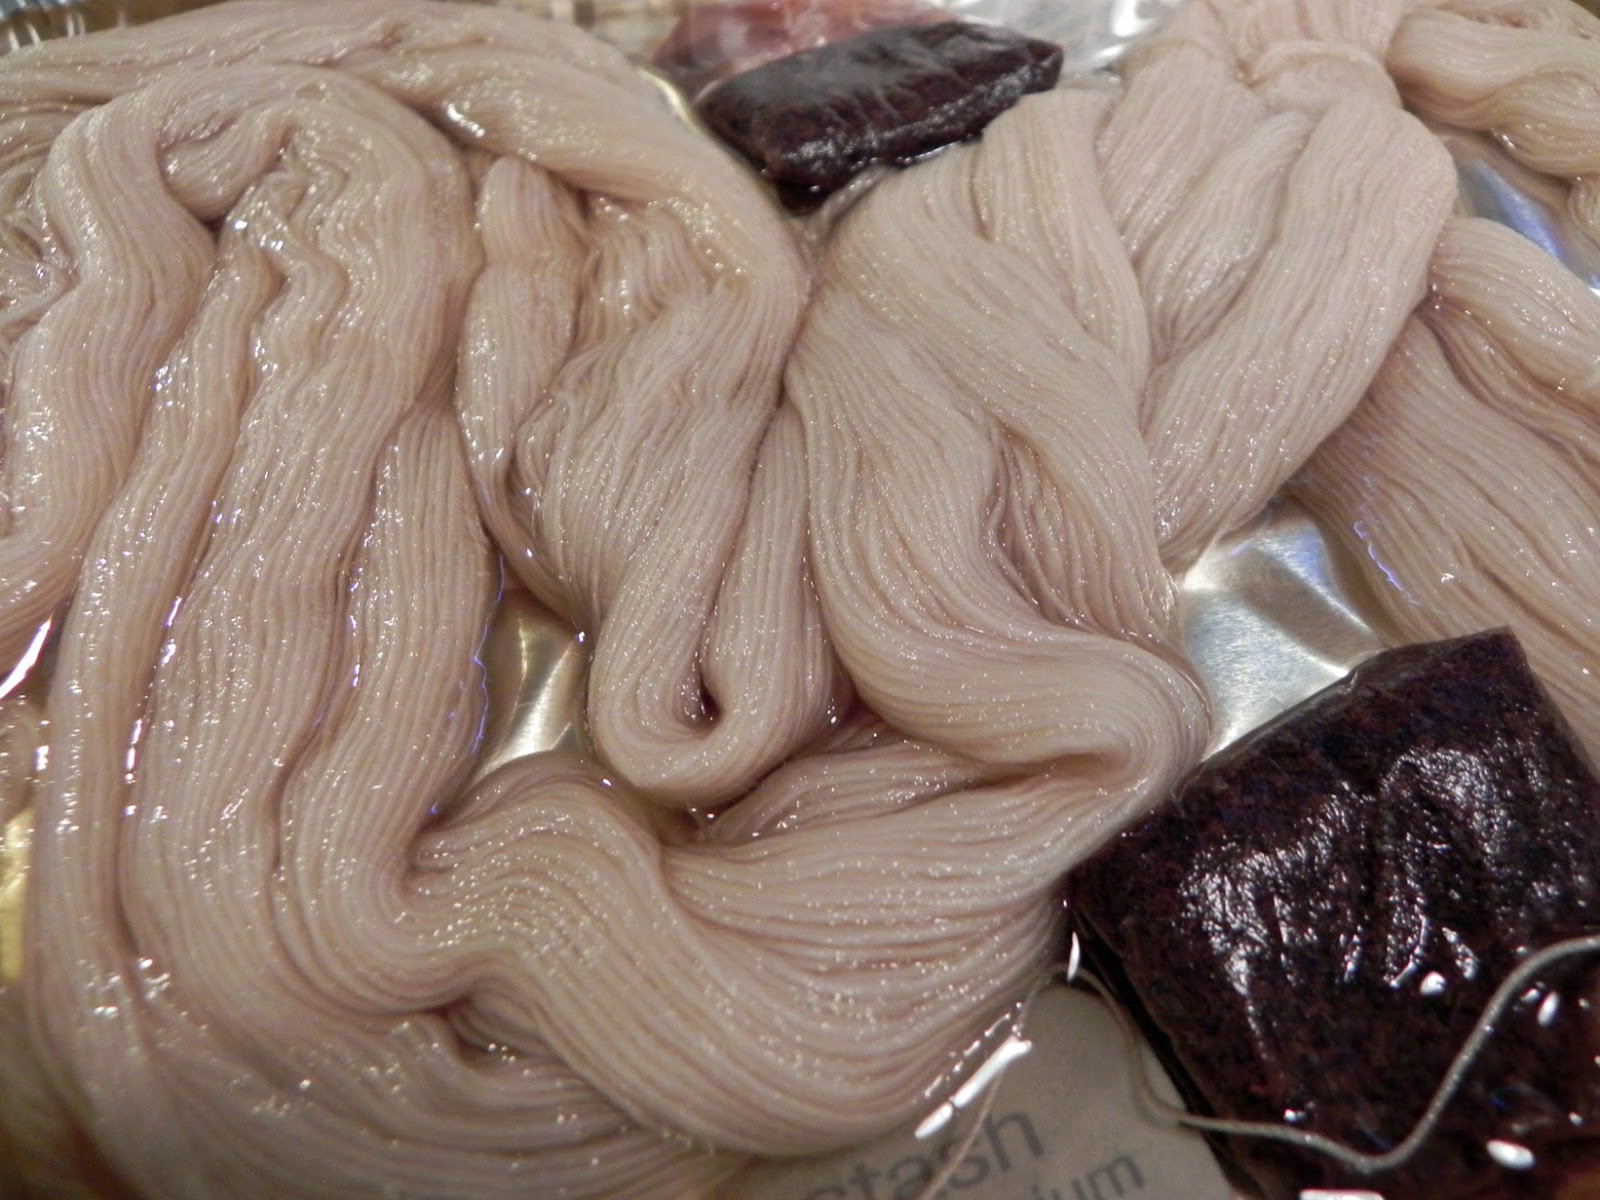
Wet skeins totally look like intestines.  Way less yummy than dry, smooshy yarn!

I dyed the second skein with the teas too, but then I splashed burgundy dye on it.  We were all puzzled when the burgundy turned bubblegum pink after a few minutes in the oven. It was weird, but we rolled with it, adding light browns and yellows to tone down the pink into a more dusty pink.

Look at all that yummy yarn!
 I didn't get pictures of everybody's goodies, but Nikki's tye dye yarn was my absolute favorite!  I can't wait to see what she makes out of it!


After I got the hang of it, I was kicking myself for only bringing two skeins to dye, but lucky for me, Shelley didn't have time to dye all her mini-skeins she made for hexipuffs and she asked me to dye them for her.  UM, YES PLEASE.  


It was so much fun.  You can see where I tried to mimic Koigu and Malabrigo colorways.  I'm a fan, you know.  :)


Waiting on the yarn to dry was probably the hardest part of the entire process.  I kept pacing around, checking the yarn every few hours until the group told me that the yarn usually doesn't dry until the next morning.  Devastating!  

It felt like Christmas morning when I woke up on Sunday to find my yarn ready to wind up and go.  I'm so in love with the cream color the tea gave the yarn and the pink one is reminiscent of Malabrigo's dusty colorway, which makes me pretty happy.


I might have to make dying yarn a regular thing.  Yes?  Yes?