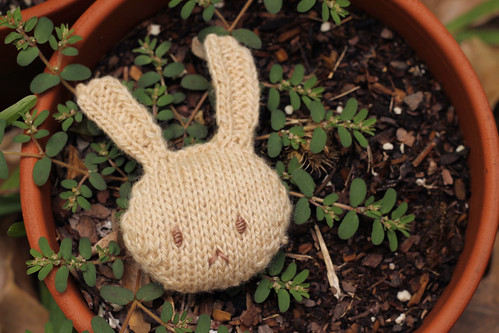
Does your beekeeper's quilt need a little bunny love? Then here's a tutorial on how to modify an already finished hexipuff to an adorable bunnypuff!

On an already finished hexipuff, pick the two corners you want to be the ears. On one corner slide your needle under four stitches on one side of the puff. Do the same onto the other side of the corner using a second needle. One needle will be your "front" needle and the other needle will be your "back" needle.
1. (K1, p2, k1) on the front, knit all on the back
2-3. Repeat round 1
4. (K1, purl front and back of one stitch, p1, k1) on the front, (knit 1, kfb, k2) on the back
5. (K1, p3, k1) on the front, knit all on the back
6-13. Repeat round 5
14. (Ssk, p1, k2tog) on the front, (ssk, k1,k2tog) on the back
Use the same technique you use to bind off your hexipuffs (three needle bind off or crochet hook), and repeat on the second corner for the second ear.
I used overhand knots for the eyes, which are very simple. (I believe Miss Tiny Owl Knits has a quick video here: http://vimeo.com/tinyowlknits/thewoodsyassociation#t=499) I looped my eyes 5 times.
I hope this tutorial was helpful!
♥ ashley